Ever faced the frustration of not being able to add your favourite Chrome extension because it's blocked on the Chrome Web Store?
Don't worry! There's a solution – if you have the ZIP file of the extension.
Curious how? We'll guide you through the process of adding Chrome extensions using ZIP files. Get ready to unlock a whole new world of possibilities for your browsing experience!.
Warning - 🛑 Please Check The Extention File Carefully Before Use It
Steps to add Extensions to Chrome using the ZIP file.
Step 1: Visit chrome://extensions
- Open your Chrome browser and go to the address bar.
- Type chrome://extensions and press Enter.
It looks like this on your laptop.
Step 2: Enable Developer Mode
- You have to Enable the Developer mode in the top right of your extensions window. In the top right corner of the Extensions page, you'll find the "Developer mode" option.
- Enable Developer mode to gain root access to your Chrome browser, allowing you to perform advanced tests.
Step 3: Click on the Load Unpacked Button
- On the Extensions page, locate the "Load Unpacked" button on the top-left side.
- Click the "Load Unpacked" button to proceed.
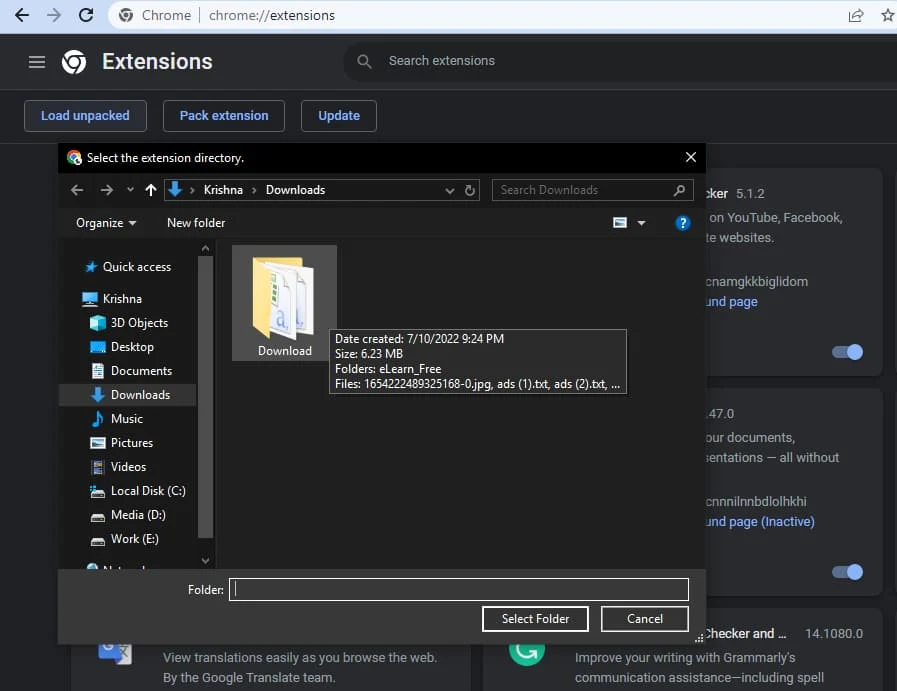
Step 4: Select the Extension Folder
- After clicking "Load Unpacked," a File Explorer window will open.
- Navigate to the location where you have extracted the ZIP file containing the extension.
- Select the extension folder with all the necessary files for the extension to function correctly.
Step 5: Confirm Extension Addition
- Once you've selected the extension folder, Chrome will add the extension to your browser.
- The extension will now be available with all its functionalities.
- If any functionality is not working as expected, double-check the data in your ZIP file.
- Once you select the folder the extension will be added to your Chrome browser with all the functionality if something is not working check your ZIP file data.
If your files are good but still the Chrome extension is not working try updating the extension from the developer mode. it will be on the life side of your window.
Conclusion:
Adding extensions to Chrome from a ZIP file can be a useful way to install custom or unreleased extensions. By following these step-by-step instructions, you can enable Developer mode, load the unpacked extension, and enjoy the additional features and functionalities it provides.


